
A new GoHighLevel account can answer leads, book jobs and follow up on its own. Out of the box it does none of that, because it doesn't know your business name, your hours or your phone number yet. Thirty minutes of setup fixes that.
Quick answer: On day one, fill in Settings > Business Profile (logo, legal name, address, time zone), connect a branded domain, add your team as Users rather than Admins, buy a local phone number in Phone System, set your working hours in Calendars, import or add your first contacts, and send yourself a test text from Conversations.
What's on the GoHighLevel menu?
The left menu is where everything lives:
- Conversations: every text, email and call in one inbox.
- Calendars: your bookings.
- Contacts: your customer list.
- Opportunities: your sales pipeline.
- Automation: follow ups that run on their own.
- Sites: your website and forms.
- Reputation: reviews.
Most of day one happens in Settings, at the bottom.
Step 1: Fill in your business profile
Open Settings, then Business Profile. Everything on this page shows up in your texts, emails and invoices, so do it before you send anything. Upload your logo, check your business name, and enter your legal business name exactly as it's registered. Add your business email and website.
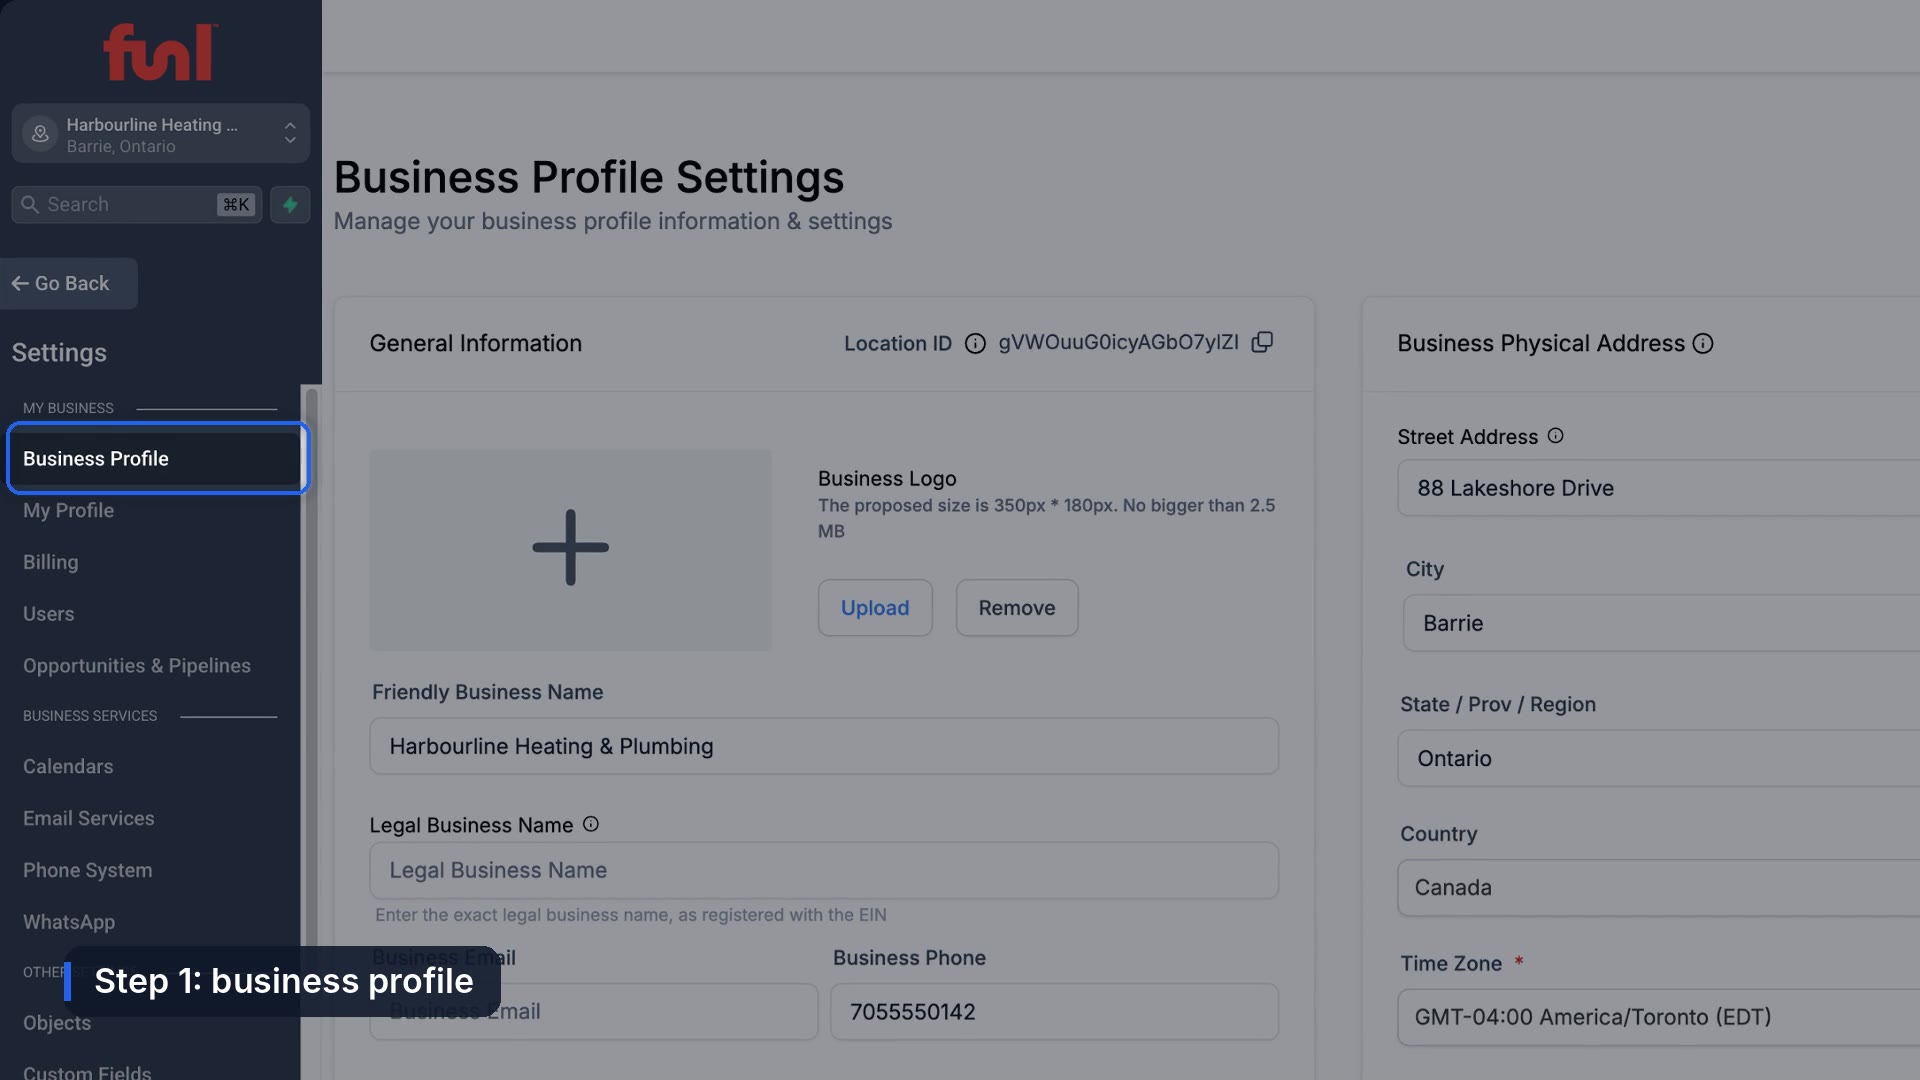
Then check the address and time zone on the right. A wrong time zone means your appointment reminders go out at the wrong hour.
Step 2: Connect a branded domain
Use a subdomain of your own website, like app.yourbusiness.com. Once it's connected, the booking and review links your account sends show your domain instead of a generic one, and customers are more likely to click a link they recognize. Add a CNAME record at your domain provider pointing to the address shown in the note on the Business Profile page, then click Add Domain.
Step 3: Add your team with the right role
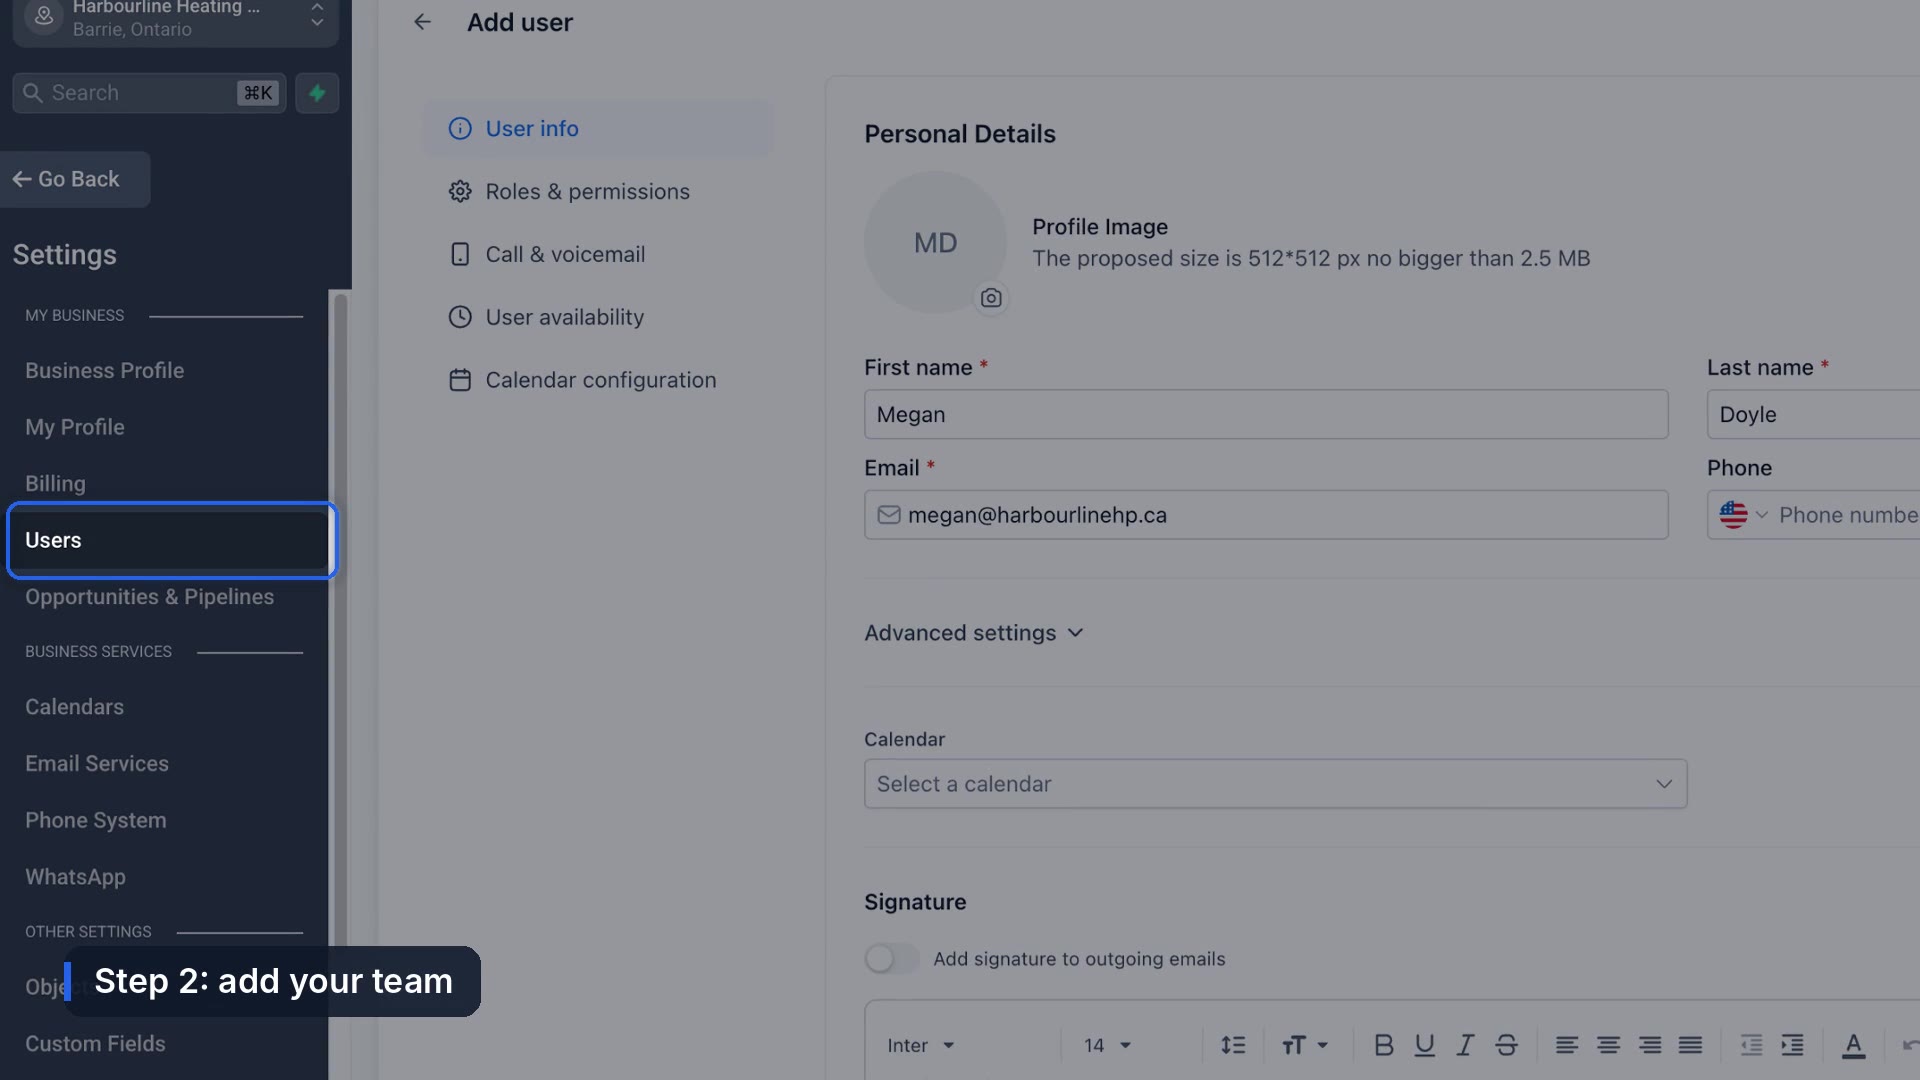
Go to Users, click Add User, and enter their name and email. Then open Roles and Permissions. New users start as Admin, which lets them see billing and change settings. Most staff only need User. Switch it and turn off anything they don't need.
Step 4: Get a phone number
Go to Phone System and click Add Number, filter by your area code, and buy a local number. The first purchase asks you to verify your identity, and texting needs carrier registration before messages will send. Both have their own walkthroughs: how to get a business phone number and how to register for A2P texting.
Step 5: Set your calendar hours
In Settings, open Calendars. Your account comes with one calendar ready to go. For now, open My Availability and set your working hours. Customers can only book inside those times.
Step 6: Add contacts and send a test
To bring in customers you already have, click Import on the Contacts page and upload a spreadsheet. For your first contact, add yourself with your own cell number.
Then go to Conversations, start a new message to yourself, and send a text.
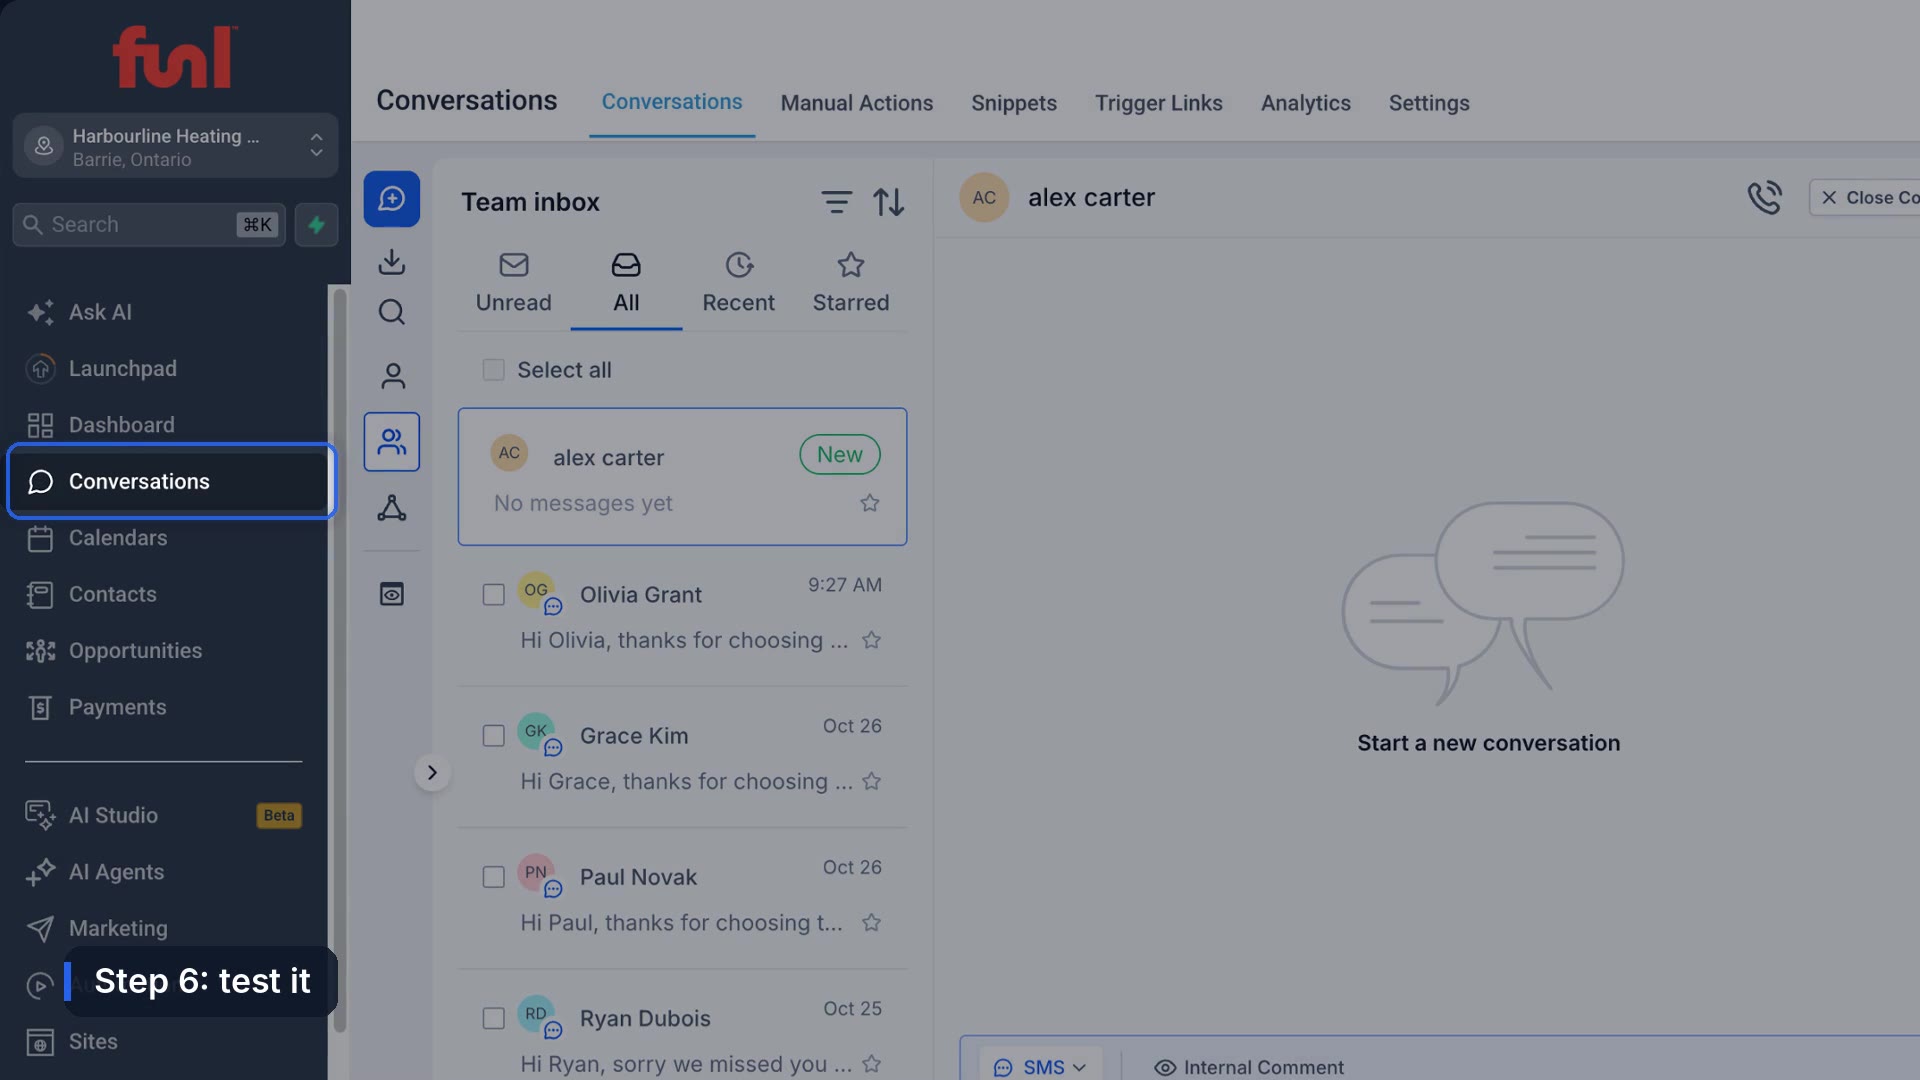
- If it says no phone number added, go back to step 4.
- If the message shows failed, your texting registration probably isn't approved yet. Click view details to see why.
- If it works, the text lands on your phone from your business number, and your reply shows up in Conversations.
What to set up next
With the basics done, these pay off first:
- Missed call text back, so every unanswered call gets a text.
- Appointment reminders, so fewer people forget.
- Workflows, once you're ready to automate your own follow ups.
The step that holds everyone up
Texting registration is the one part of day one you can't finish in a day. Everything else on this list is done in minutes, but the carriers decide when your texts can go out. We still don't have a reliable way to predict that wait, so start the registration first and do the rest while you wait.
Frequently asked questions
What should I set up first in GoHighLevel?
The business profile, because it fills in your texts, emails and invoices. Then start your phone number and texting registration early, since approval takes time.
Should my staff be Admin or User in GoHighLevel?
User, for most staff. Admin can see billing and change account settings.
Why can't I send texts in GoHighLevel?
Either there's no phone number on the account yet, or the number's A2P texting registration isn't approved.
How long does GoHighLevel setup take?
About 30 minutes for the basics in this guide, plus waiting time for texting registration.
Funl is built on HighLevel. Links to HighLevel are referral links, so we may earn a commission if you sign up.